
The Home Network How-To
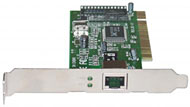
Network Interface Card |
With many homes now having more than one computer, home networks are becoming more and more appealing to the average PC user. Networking your computers together allows you to transfer files amongst the different computers at breakneck speeds, as well as share a printer or scanner or other peripheral. | |
|
A basic network (LAN or Local Area Network) consists of two computers that
are linked in order to share resources (such as printers and CD-ROMs),
exchange files, or allow electronic communications.
For this article, we will assume that your local cable or phone company has installed a broadband Internet connection on one of your PCs. If they haven't, then that should be your first step. Many new homes are being built pre-wired for Internet. This means that you have network cables running throughout your walls and coming out as jacks in the wall in various rooms. If this is the case then you will have an even easier time setting up your network. If not, that's ok too, as cables can be neatly run under carpets, through attics, or along baseboards. |
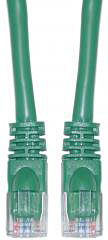
Ethernet CAT5E Cable |
|
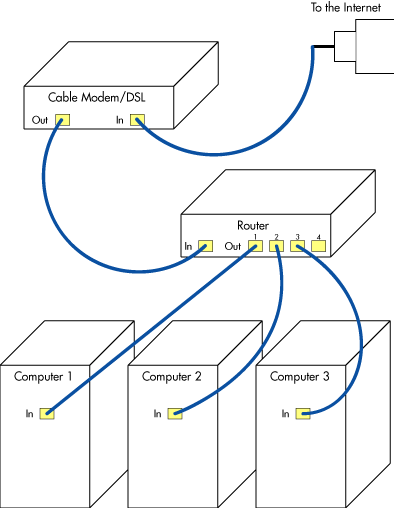
For the basic network, you will need the following in order to connect two or more computers together (see figure to left):
- A broadband internet connection (such as cable modem or DSL)
- A router
- One CAT-5E network cable for each computer
- One CAT-5E network cable for modem
- One network interface card for each computer
Note that more and more computers are offering a network card already built in, so check your computer for an Ethernet cable port before purchasing another card.
Plan Your Setup
| Next, you need to figure out how and where to run the appropriate length cables to fit your specific needs. We offer special flat Ethernet cables specifically designed for running along baseboards and the floor. This helps in keeping them out of the way and from people tripping over them. Connect one end of a network cable into the back of your DSL/cable modem and the other into the "Internet" port on the back of the router. Connect a network cable in the back of each of your computers and into separate ports in the back of the router. You now have the start of a basic network. |
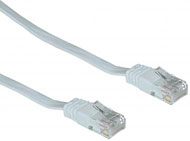 Flat Network Cable |
Note that the purpose of the network router is to allow multiple computers to
share one internet connection, without having to pay for a
multiple-connection option from the internet service provider.
Most new computers will auto-configure your router and get you connected. You
may have to configure your computer to turn on DHCP. This allows your router
to differentiate between your different computers.
Enable DHCP
If you have a Windows based computer:
Go to Start -> Programs -> Control Panel -> Network Connections.
Right click on the connection and select Properties. Select Internet Protocol
(TCP/IP) and click properties. Select Obtain IP Address Automatically and
Obtain DNS Server Address Automatically. If you are using a Windows 2000
machine you must then click Advanced and select DHCP Enabled and click OK.
You may have to reboot for the settings to take affect.
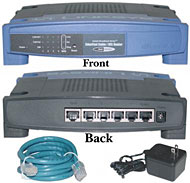 Network Router |
If you have a Mac running OS 10.2: Go to System Preferences -> Network. Click on the TCP/IP tab. In the TCP/IP panel, change Configure Manually to Using DHCP. Delete any Domain Name Servers that are listed in the Domain Name Servers box. Click Apply Now. If you have a Mac running OS 10.3: Go to System Preferences -> Network. From Show, choose Built-in Ethernet. Click on the TCP/IP tab. From Configure, choose Using DHCP. Delete Domain Name Servers. Click Apply Now. Repeat the above steps for each computer on the network. |
Setup Sharing
To allow for the other computers to share certain folders or printers:
If you are running Windows 2000/XP: Right click on any file folder and go to
Sharing and Security... Select Share This Folder. Click OK. The other
computers on your network can access anything you put in this folder. To
share a printer, on the PC with the printer, go to Start -> Printers and
Faxes. Right click on the printer you'd like to share and select
Sharing... Select Share this Printer. Click OK
If you have a Mac running OSX:
Go to System Preferences (on the Apple menu) and click on Sharing. Select
Personal File Sharing. The "Public" folder in your home folder will
now be shared automatically. Use the address displayed at the bottom of the
Sharing window to access this folder from other computers. Unlike Windows,
Mac OSX does not allow you to share any folder you want. To share printers,
select Printer Sharing.
Editor's note:
If you'd like to learn more about networking in general, take a look at
our previous technical articles,
Networks Untangled (Part 1)
and
Networks Untangled (Part 2).