
Wireless Home Networking
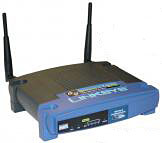 Wireless Network Router |
Last month we looked at how to setup a basic home network. This month we are going to show you how to make it wireless. It might not be as simple as just unplugging all the cables from your network, but it sure comes close. Wireless networks are quite popular today, as well they should be. The ease of setup without the messy wires makes for an extremely convenient network. And though the technology involved is pretty complex, setting up a wireless network is anything but. |
|
We are going to assume that your cable or DSL company has come in and setup an Internet connection for one of your computers. If they have not, then that would be your first step. From there we can convert that wired setup into a wireless one. The wireless network will use the cable/DSL modem in much the same way as the wired network does. First, connect your wireless router to your modem, and plug your modem into your DSL/cable Internet line. If you have a main "immobile" PC in your home you can connect it directly to the wireless router via a standard Ethernet cable. This is actually a popular way to start, as your pre-network setup probably contains one PC connected to the Internet via a network cable and modem. This also gives you an easy, central place to install printers, scanners etc., for your wireless PCs to access. Most wireless routers also have several wired connection ports. This gives you the capability of connecting PCs/laptops to your router via standard CAT5E ethernet cables. Some routers will require you to start with at least one computer connected via wire for the configuration process, but when you are done you can disconnect and move your PC and leave the router and modem where it is. |
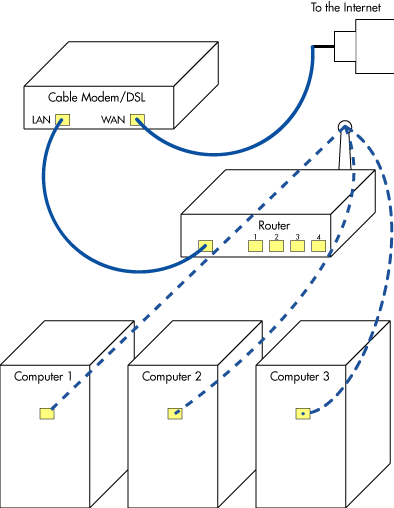 Example of a Wireless Network |
If you do not want to connect any PCs with cables to your router, you will need to decide where your wireless router will sit in your home. A typical wireless router can interact with computers in a 200-300 foot radius depending on obstructions. As you move farther away from the access point, the connection will become slower. Walls and other obstructions, especially concrete, further limit wireless range. So it is best to position the access point centrally in your home. The closer a PC is from the router the stronger the signal will be. In some homes, you might also be restricted by phone/cable line locations and so that may dictate where you put your router.
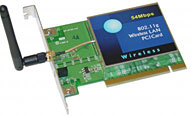 PCI Wireless Adapter |
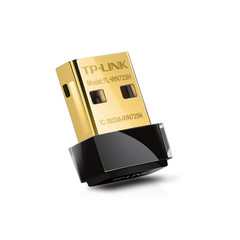
Each computer that will be wirelessly connecting to your network will need to have a wireless network card installed. If you do not have a free slot in your PC or if you do not feel like popping open your computer, many different wireless USB adapters are available. Though it is not crucial, choosing a router/network-card combination that are of the same brand can make configuration a lot easier, as well as let you take advantage of special features that may be included in the devices. At the very least, be sure to choose a router/adapter combo that uses the same wireless protocol. The wireless protocol essentially determines the speed at which the devices are able to communicate with each other. The most commonly used protocol today is 802.11g, which, at 54 megabits per second, is faster than the older 802.11b. 802.11n is just starting to become more common, though only for very specific applications. It is very expensive and your average wireless network is not able to take advantage of its speed. |
Security
Security is the most overlooked step in setting up a wireless network. Because wireless signals can penetrate through walls and floors, it is possible for anyone with a wireless laptop to connect to your network. Once connected, they can root around in your shared files and even introduce viruses onto your PCs. Fortunately, it is really easy to secure your network.
There are 2 types of protection offered by wireless routers. One is a firewall. The other is encryption. They can be used at the same time.
Encryption, which decides who can use your wireless connection and who can't, has two common types: WEP and WPA. Without getting super technical, WEP requires users that want to enter the network to put in a specific keycode, while WPA requires users to tell the network who they are and request a keycode for access. The differences are pretty technical, but to simplify it I'll put it this way: WEP is the old style and will certainly stop the casual passersby from accessing your network, while WPA is newer and will stop even the craftiest hacker. Your desired level of security will determine which type you choose to use.
For both the firewall and/or WEP/WPA protections, follow the instructions that came with your router as the procedure for enabling encryption varies from product to product. Most new computers will auto-configure your router and get you connected. You may have to configure your computer to turn on DHCP. This allows your router to differentiate between your different computers. The best way to start configuring is on the hardwired PC and then move on to each wireless one. |
 USB Wireless Adapter |
Enable DHCP
If you have a Windows based computer: Go to Start -> Programs -> Control Panel -> Network Connections. Right click on the connection and select Properties. Select Internet Protocol (TCP/IP) and click properties. Select Obtain IP Address Automatically and Obtain DNS Server Address Automatically. If you are using a Windows 2000 machine you must then click Advanced and select DHCP Enabled and click OK. You may have to reboot for the settings to take affect.
If you have a Mac running OS 10.2:
Go to System Preferences -> Network. Click on the TCP/IP tab. In the TCP/IP panel, change Configure Manually to Using DHCP. Delete any Domain Name Servers that are listed in the Domain Name Servers box. Click Apply Now.
If you have a Mac running OS 10.3:
Go to System Preferences -> Network. From Show, choose Built-in Ethernet. Click on the TCP/IP tab. From Configure, choose Using DHCP. Delete Domain Name Servers. Click Apply Now.
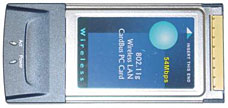
Wireless Adapter For Laptops
Setup Sharing
To allow for the other computers to share certain folders or printers:
If you are running Windows 2000/XP: Right click on any file folder and go to Sharing and Security... Select Share This Folder. Click OK. The other computers on your network can access anything you put in this folder. To share a printer, on the PC with the printer, go to Start -> Printers and Faxes. Right click on the printer you'd like to share and select Sharing... Select Share this Printer. Click OK
If you have a Mac running OSX:
Go to System Preferences (on the Apple menu) and click on Sharing. Select Personal File Sharing. The "Public" folder in your home folder will now be shared automatically. Use the address displayed at the bottom of the Sharing window to access this folder from other computers. Unlike Windows, Mac OSX does not allow you to share any folder you want. To share printers, select Printer Sharing.
Repeat the above steps for each computer on the network.