Login / Register 
Contact Us
Shop By Category
Shop CableWholesale's biggest price breaks!Extreme Deals! New ProductsNew Products Technical ArticlesTechnical Articles

How To Make An Ethernet Patch Cable

This month we're going to show you how to make your own ethernet patch cable!

The two main choices you will encounter when choosing an ethernet cable is whether you would like to use Cat5e or Cat6. The chief difference is going to be the bandwidth of each cable. Cat6 cables have the ability to transfer a larger amount of data than Cat5e cables. This doesn't necessarily mean it always makes sense to choose Cat6. In fact for home networks it may make more sense to choose Cat5e cables. Also you probably won't need the extra bandwidth Cat6 provides at home. Cat6 is fantastic for commercial settings, larger networks, and for high-end multimedia set-ups.

Another important note is that while making a DIY patch cable is a rewarding experience for general home or office use it may make more sense to purchase pre-terminated patch cables. Please view this article for information and learning purposes and not as the best way to obtain a patch cable.

While we understand at first glance this may seem like a daunting task it's actually quite straight-forward. All it takes is the right tools, patience, and the willingness to learn. So let's get started!

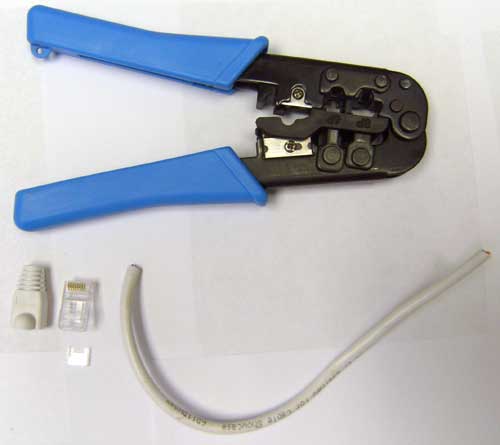
Tools and Parts you Will Need:

Cat Cable Construction Parts

Step 1: Slide on the Strain-Relief Boot

Cat5 Boot
The first step we will perform is to slide on the strain-relief boot. This is done by slipping the cable through the hole in the boot. You will want to make sure the larger side of the boot (the part that the plastic connector will sit in) is facing towards the end of the cable. Strain-relief boot are optional, they are used to keep the wires from being bent at too sharp an angle after coming out of the connector.

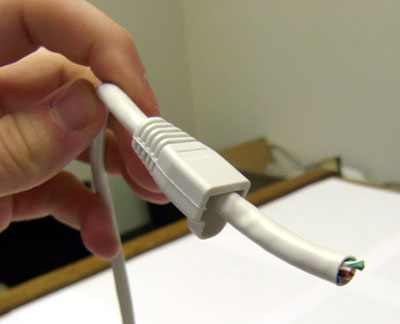
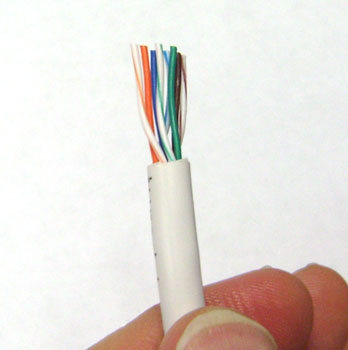
Step 2: Stripping the Outer Jacket

crimp cut Cat5 Cable clean cut Cat5 Cable
The next step is to strip the outer jacket. The goal is to leave the 4 twisted pairs exposed with enough room to straighten them out and organize them. In this example we cut off about an inch and a half which is sufficient to organize and straighten them. On many crimpers there is the ability to do this however if you find you need more room than what the crimper affords you can take a tool such as a wire cutter to cut off the desired length. Be careful to not cut the actual cables inside as it may affect its ability to carry a signal. Please note as with any sharp tool be careful to not cut yourself and please pay attention at all times.

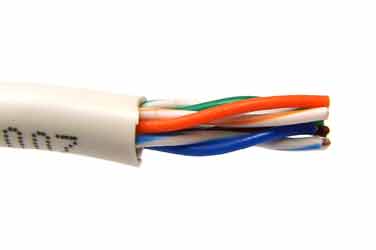
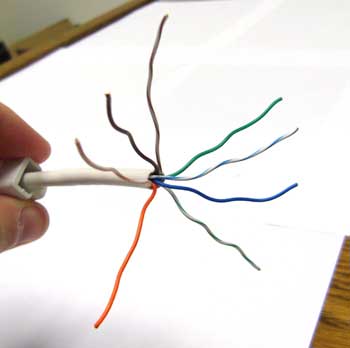
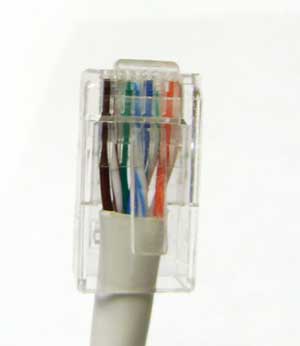
Step 3: Organizing and Lining Up the Wires

untwisted Cat5 Cable
There are a few different orders the wires can go in depending on the application you're using this cable for. The most common standards are T568A and T568B. T568A is the recommended wiring standard according to the ANSI/TIA/EIA. T568B is the older and more widely used of the two standards. The main difference between the two is that the orange and green pairs of wires are switched, however, it's important to note in terms of functionality they accomplish the same thing.

We're going to use the T568B standard. This standard uses the color order:
  1. Orange/White
  2. Orange
  3. Green/White
  4. Blue
  5. Blue/White
  6. Green
  7. Brown/White
  8. Brown

When creating patch cable wiring,it's a good idea to untwist the wires as little as possible; just enough that the wires can be sorted out. You will have to straighten out each cable so that it lines up neatly next to each other. The goal is to have the 8 cables lined up next to each other and also straight enough to be easy to manage.

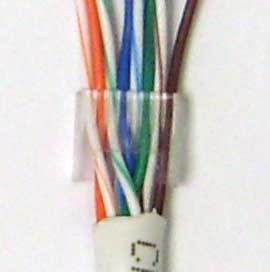
Step 4a: Cutting the Wires and Applying the Holder (With Insert)

cut cable insert guide cat 5 cable
Next up is cutting the wires and applying the insert guide. The trick to cutting the wires is that you want to do it at a sharp downward angle or to cut them one-by-one in steps. The reason for this is because they will need to be inserted into the insert guide and this is much easier to accomplished if you only have to worry about one wire at a time. Once all 8 cables are in the insert guide in the correct grooves move the insert guide down to the base of where you originally cut the outer coating of the cable.

Step 4b: Cutting the Wires (Without Insert)

Cat Cable Cat Connector and Cable no insert
If an insert is unavailable be sure to hold the wires between your thumb and forefinger tightly to keep them in order. Leave about a half inch of the wires exposed and trim the excess length with wire cutters; then, slip on the connector, making sure that the outer jacket is seated in the connector. It may take a few tries to ensure the connectors are in the correct order and are in position for crimping.

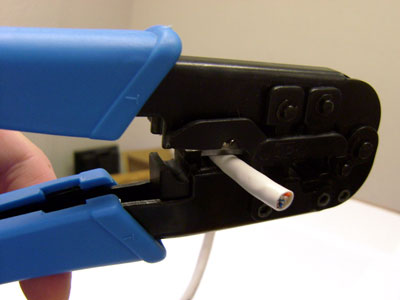
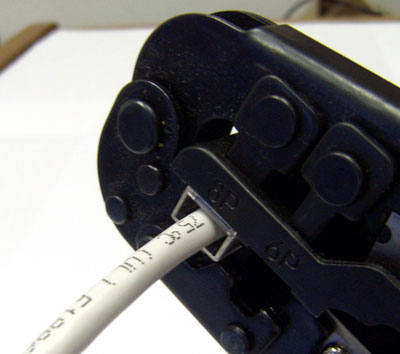
Step 5: Trimming the Cable and Slipping the Connector on the Cable

Cat Connector
Now you're ready to slip on the connector. First you will want to trim the cable to about a 1/4 inch past the insert guide(if using an insert). To be safe it may be a good idea to leave a little bit more than 1/4 of an inch on the first cut as it's easier to trim down if you don't need the extra cable as oppose to not having enough. Once the cable is the correct length, slip the connector on. The cables should slide in with very little difficulty. Make sure each wire reaches all the way to the end of the connector.

Step 6: Crimping the Connector

Network Crimp 1 Network Crimp 2
The last step is to actually crimp the connector. You may be asking "So what's actually happening during the crimping process?"

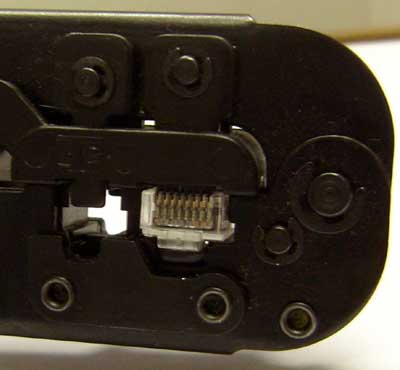
The pressure you apply on the crimper will be applied to the pins as there are 8 tiny metal prongs in the crimper that apply pressure to each of the 8 conductors on your cable. The pins in the connector are then pressed down into contact with the 8 copper wires of the cable creating a connection.

Make sure you squeeze the crimper all the way down to ensure a connection.
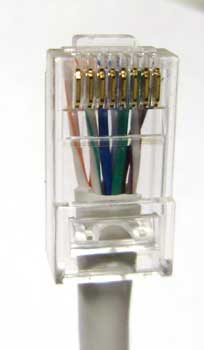
The Finished Cable

Completed Patch cable
Finally, repeat the process on the opposite side of the cable.

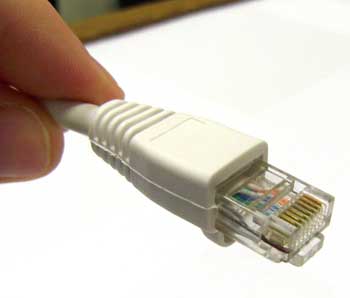
And there you have it, a completed DIY Ethernet patch cable!

As an option there are cable testers available such as our NetTestE tool, which can help test the cable after it's made.


Frustrated waiting for customer service? We get it, call us and see the difference!


What Our Customers Have To Say


Close & Continue Shopping