
Creating A Home Recording Studio
It has become more and more common in the world of audio recording for today's musician to write, produce and record music from the comforts of his or her own living space. As a musician, in the past, owning your own recording space was not a common practice. Recording technology available to anyone outside of the recording industry was too expensive and too complicated to use. In the past your only alternative was to create a budget for yourself or your band and save whatever bit of money you had so that you could afford to rent recording time in a professional recording studio. Fortunately, with the advancements of today's audio recording technology, it is possible and affordable for anyone with a desire or passion to design and develop a professional in home recording space. Whether you are a beginner with a curiosity for sound or a seasoned professional building a home recording space has become an affordable means to producing quality music. In this article I will discuss how you the reader can also design your very own home recording space using my own personal home recording studio as an example.
 |
 |
 |
 |
 |
 |
The original design for my home recording space leaned towards a pre-production studio for writing and arranging music. I did not intend on building a full on recording space but after spending a lot of time and money toting equipment to and from professional recording studios, I decided that developing my home recording space could have its advantages. As an independent musician on a budget, I don't have the financial luxury to get up and travel to a professional recording studio every time I come up with an idea. It was important for me to design a space that was affordable but that would also allow me to make a quality recording. As an artist who has spent most of his life in professional recording studios, I set out to design a space that would fit with the aesthetics of my home (my wife's requirement), but also feel like a professional recording studio.
A traditional recording studio is typically divided into several rooms. The two rooms that are the most common in any recording studio are what we call the recording booth or isolation room and the control room. Each room has a specific function and is important in achieving a quality recording.
Control Room:
The control room speaks for itself. This is where most of the recording
equipment resides and the recording process begins and ends. Any professional
recording studio has a trained recording engineer equipped with the proper
amount of knowledge to use and control all equipment necessary for the
recording process. This room is likely to occupy most of the space allotted
to your project. Also, unless you have a friend or a family member to aid you
in the recording process, recording engineer will most likely be your primary
job.
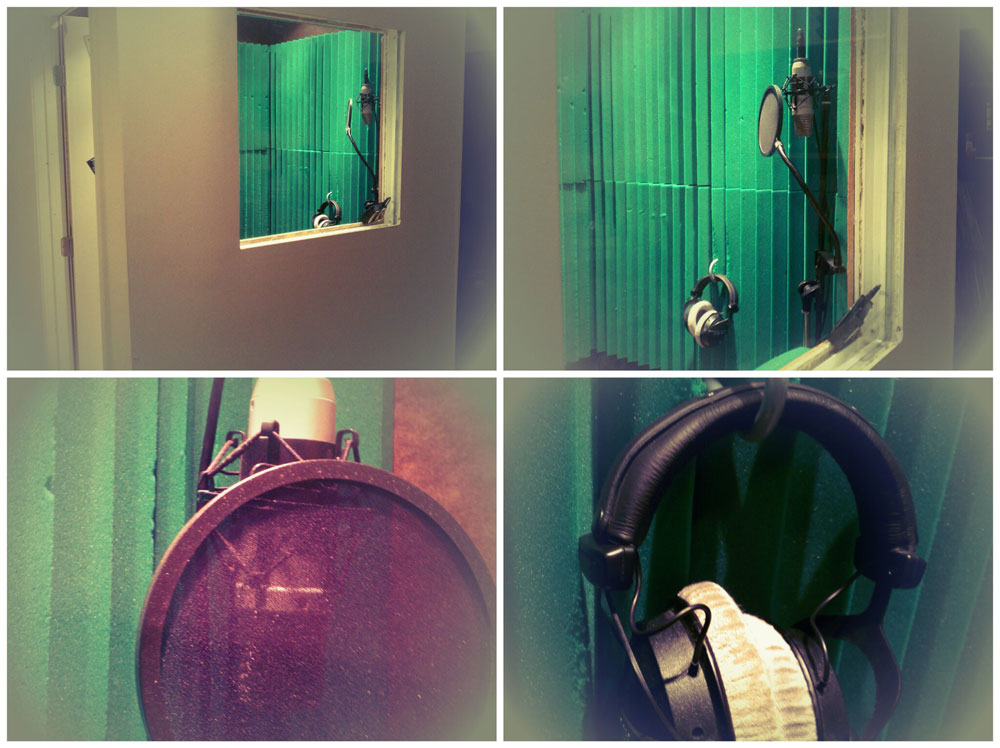
Vocal Booth:
The vocal booth is the space where vocalist or instrumentalists perform.
Performances are recorded to a recording medium inside the control room and
later manipulated by the recording engineer. The design of a Vocal booth is
intended to prevent unwanted sounds from bleeding onto an audio recording.
Vocal booths are typically treated with specially designed acoustic foam for
controlling reverberation. The idea is to create a dry vocal recording, which
can then be treated later with synthetic reverberation, using a digital FX
processor.
 |
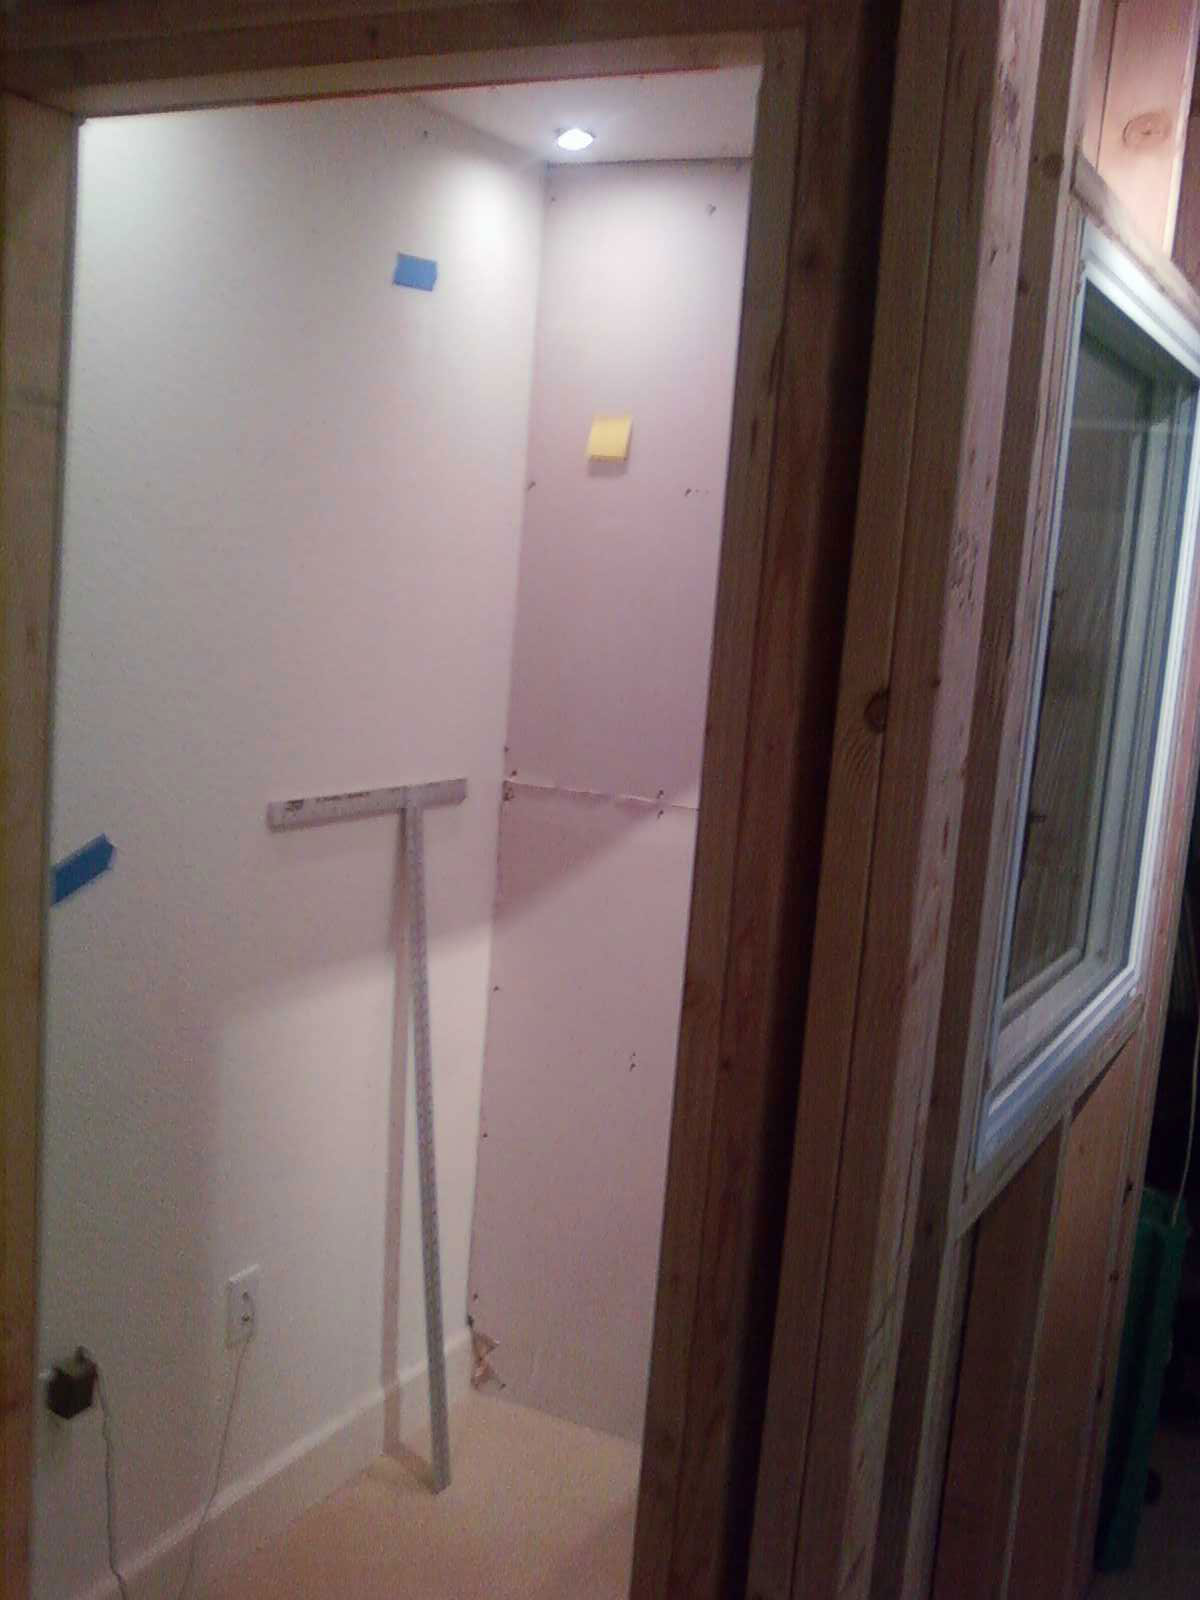 |
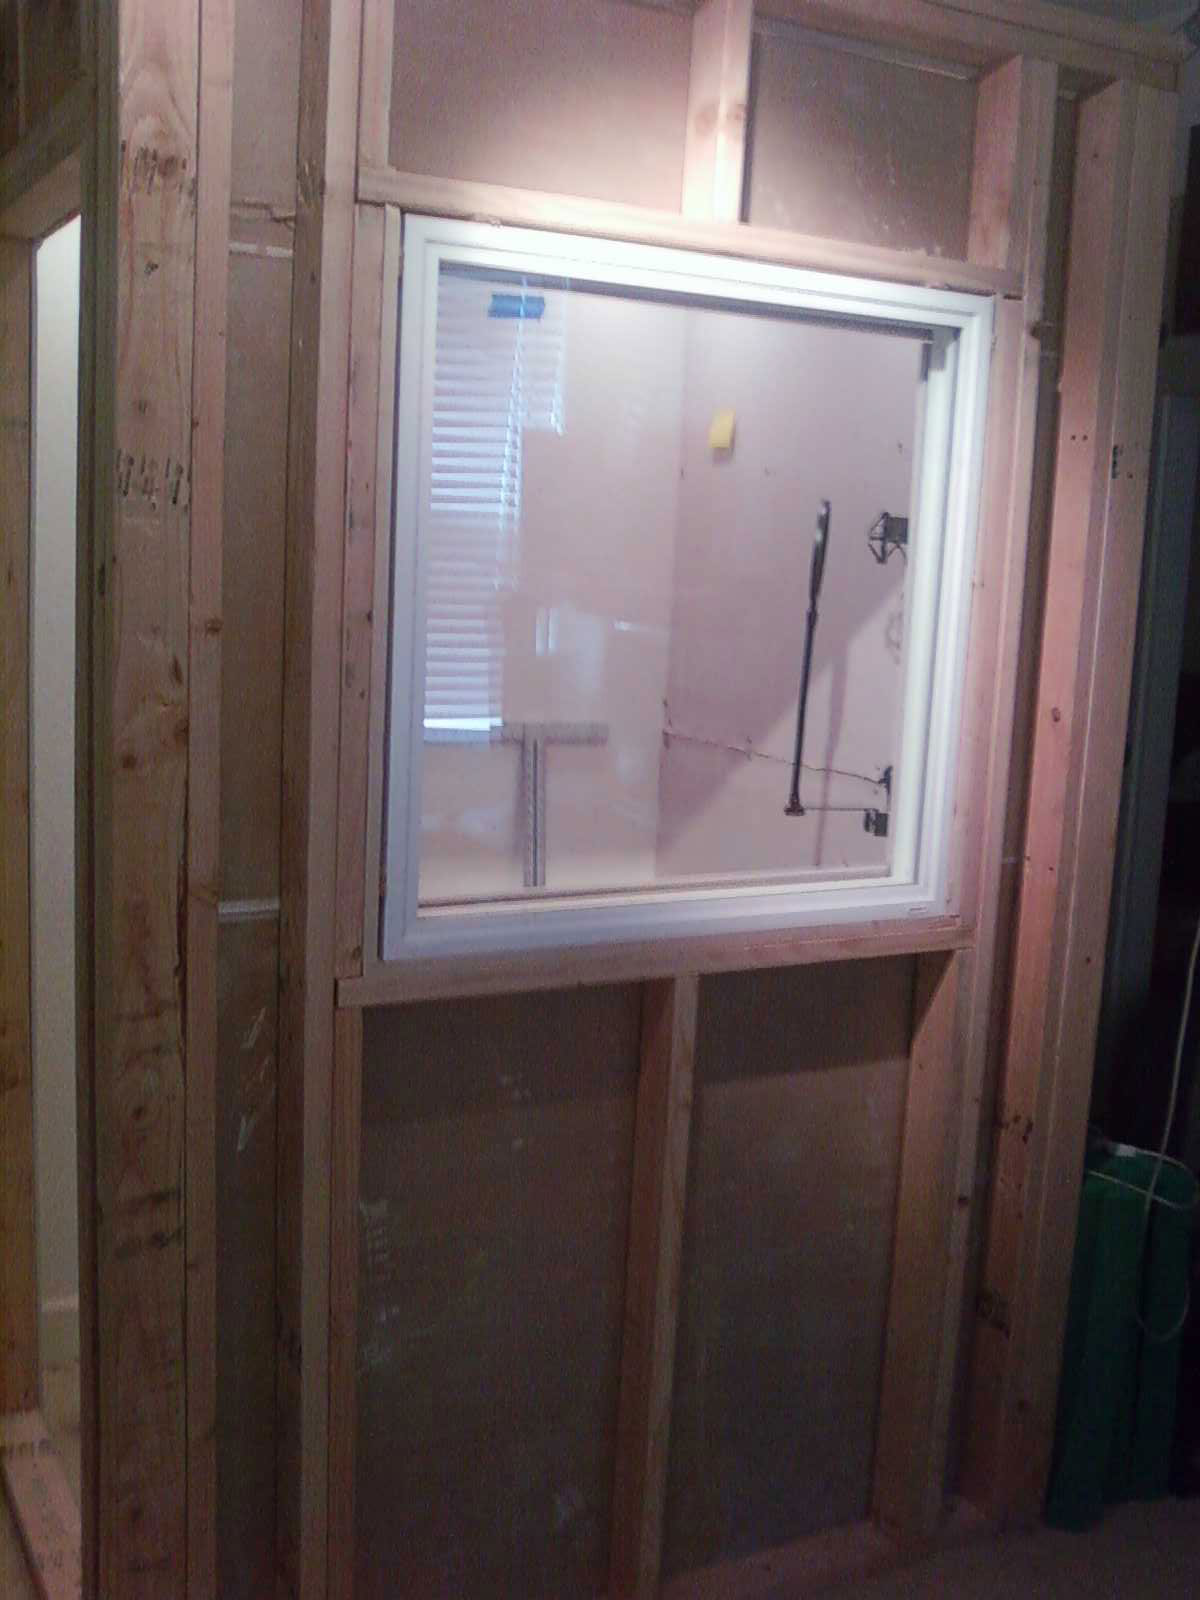
I decided to build a 4' x 6' (W) x 10' (H) vocal booth attached to an existing wall in the room allocated for my studio space, creating a room within a room. This design creates a separation between engineer and performer which allows the engineer to monitor the recording without unwanted sound interfering with the vocalist's performance. The interior of my vocal booth is treated with soundboard that you can pick up from any local hardware depot and acoustic foam designed to control room reverberation. The overall cost for construction of my vocal booth set me back about $1200.00 dollars for materials.
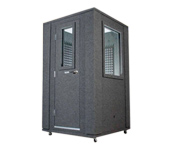
Building a vocal recording booth or a separate wall to divide up the space isn't the only option you have to achieve a workable recording space. There are plenty of affordable alternatives to help you design a studio with both a control room and a functioning isolation space. Some homes have bedrooms built with a walk-in closet which if properly treated with acoustic foam or sound proofing materials, can also be used as a vocal booth or isolation space. Other options are pre-constructed, industry designed, portable recording booths.
 |
 |
Now everyone's home recording studio will have it's own unique quality and will be designed and constructed to his or her liking, but there are at least 4 core pieces that each recording studio MUST have in order to achieve a quality recording.
- Audio Recorder (Analog Recorder or Digital Audio Workstation). First and for most, you will need an audio recording device to receive the audio signal you are trying to capture. What you decide will be your own preference, but you can either use an analog system that uses magnetic tape to capture sound or a Digital Audio Workstation (DAW), an electronic based system designed to record, edit, and playback digital audio. Each system has its pros and cons but most recording studios today prefer using Digital Audio Workstations. They come in two forms, an integrated DAW, which consists of a control surface, mixing console, A/D audio converter and data storage combined into one single device or digital audio recording software. As computers increase in processing power and decrease in price, digital audio recording software has become the more affordable option for most recording studios. Another benefit is that most digital audio software comes with a bundle of software plug-ins that simulates external audio hardware (Compressor/Limiter/, Equalizer, FX processors, etc.) that you would see in professional recording studios. If you're going to use digital audio recording software as your weapon of choice, there are at least two other pieces of hardware that are required for use with the software. Using digital audio software, you'll also need a computer that will fit within the software's user requirements, and you'll also need an audio converter (Sound card or audio interface) that will convert an analog signal into a digital signal, allowing for sound to be recorded into your digital audio software.
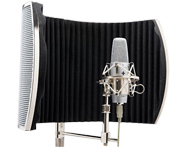
- Condenser Microphone. Investing in a quality microphone is essential to your home recording studio. If you're trying to produce quality recordings, taking time to research which microphone is affordable, durable, and works best for your recording needs, is something that I recommend to anyone who has the desire to build a home recording studio. Regardless of which recording medium you use to input sound, a quality condenser microphone is the key component in achieving that professional recording that most musicians set out to achieve. Condenser Microphones can range in price from $100.00 dollars to $3,000 dollars, but don't be discouraged by price, you can find a quality condenser microphone in the lower end of the price spectrum that will produce quality recordings and satisfy your needs. Condenser microphones are typically used in recording studio environments for its high frequency response, transient response and loud output. A condenser microphone also requires the use of a 48-Volt power supply, which is generally called "Phantom Power". Depending on the design of the microphone, some of them come with a power switch available on the body for powering up the microphone. Other designs require a separate power supply. Most Microphone pre amps or audio mixers have a switch or button on the device that will supply 48- volt phantom power.
- Studio Monitors. Studio monitors also called reference monitors are a pair of loud speakers specifically designed for audio production applications and are an important piece of equipment to have in your home studio setup. Studio monitors are designed to produce a relatively flat (linear) frequency response to allow the loud speakers to reproduce an accurate representation of the tonal quality of the sound source. In a recording studio environment, engineers prefer using monitors for mixing and mastering audio. Monitors enable an engineer to mix an audio track that will sound pleasing on a wide range of playback systems. The physical design of a pair of studio monitors are typically more robust than your average home hi-fi speakers. Monitors are either active (including one or more internal power amplifier(s)) or passive (these require an external power amplifier). Studio monitors range in price from around $ 150.00-2,000 dollars a speaker. If a pair of studio monitors don't fit into your home recording budget, then a nice pair of studio monitoring headphones is a good alternative. The price range for a set of studio monitoring headphones is around, $ 200.00-1,000 dollars.
- Microphone Preamplifier. A microphone preamplifier is a device used to amplify a microphone signal before being processed by other equipment. A microphone signal is usually too weak for transmission to mixing consoles or recording devices. A preamplifier will boost the signal to line level by providing stable gain while preventing induced noise that would otherwise distort the signal. Today, you'll find that most audio interfaces or mixing consoles will have an electronic solid state microphone pre-amp built into the device. I prefer and would suggest purchasing an external microphone pre-amp, preferably one that uses a vacuum tube. The solid state pre-amplifiers built into your recording devices aren't always the most reliable when it comes to sound quality. Microphone pre-amps that use a vacuum tube are highly desired in the recording industry for their natural warm tones. Microphone pre-amps range in price from 150.00 to 2,000 dollars.
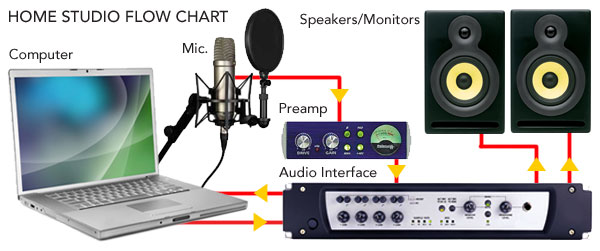
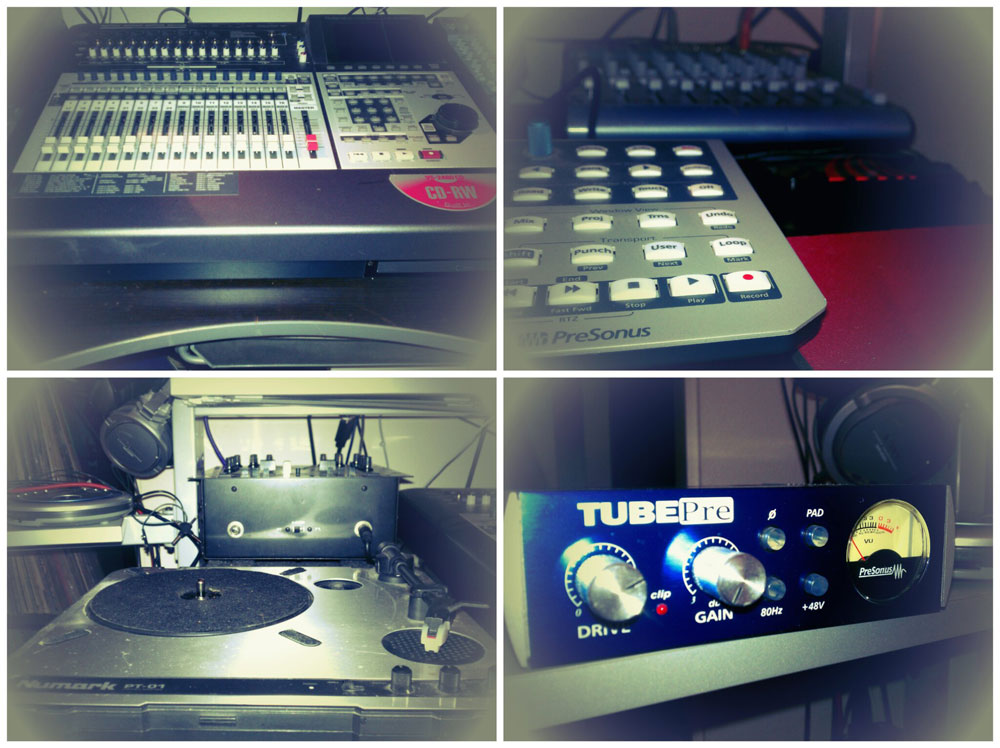
Above is an example of my studio setup. The diagram illustrates the signal chain connecting the core pieces of recording equipment I have in my home recording setup.
- First piece of equipment in the signal chain is my Rode NT1 Condenser Mic. Rode created the NT series, which is an inexpensive line of condenser Mics. One of the few microphone lines that can stand up against the big boys, the Rode NT series is perfect for your home recording needs. With a warm, lush sound, the NT1 does remarkably well across all frequencies, and is perfect for use as a vocal Mic. The Rode NT1 has a rugged, durable casing and a dual mesh screen, which covers a large diaphragm. The Rode NT1 prices around $200.00 to $230.00 dollars and is a must buy if you are designing a home recording studio on a budget.
- I then use a 3-prong XLR cable to connect my Rode NT1 Condenser Mic to my Presonus Tubepre. Presonus developed an inexpensive pre-amplifier that uses a vacuum tube to amplify the signal that passes through it. The Presonus Tubepre costs around $100.00 to 150.00 dollars and is among the low-cost pre-amps on the market, but offers the best value for aTubepre in its price range. The Tubepre can be used to amplify microphones or line level devices (Synthesizers, samplers, guitars, etc.) The pre-amplifier comes equipped with both a drive knob and gain knob for tonal coloration and amplification. It also come equipped with, +48v phantom power, 80 Hz rumble filter, a phase inverter switch, and a -20 db pad. A must have piece of equipment for home recording studio users on a budget.
- Out of the Pre-amplifier, I then use a 1/4 (TS) connector cable to connect the output of the Presonus Tubepre, to one of the 8 line level inputs on the back of my Digi 002 audio interface. Digidesigns Digi 002 software/hardware digital audio workstation is a native 32 track DAW designed to operate specifically with their Pro Tools LE audio editing software. The Digi 002 comes in either a 19" rack mountable design or as a control surface. The Digi 002 also has two IEEE-1394 firewire connections, which allow you to connect the device to a computer. The Digidesign Digi 002 model has been around for a few years now, so you can find them reasonably priced on eBay for around $600.00 to 800.00 dollars, used but in mint condition.
- Using two 1/4 (TRS) stereo connector cables, I connect the Digi 002s Left & Right monitor outputs to my pair of KRK Rockit 5 powered studio monitors. KRK produced a pair of flat response studio monitors that are priced at about $ 299.00 dollars a pair MSRP. They are perfect for use in a small room environment and are a perfect choice for a home recording studio user on a budget.
Hopefully, by bringing you into my world and giving you a brief glimpse of my home recording space, you now have a better idea on how to build a professional recording studio, right from the comforts of your home. Also after reading this article, you now have the insight on which pieces of equipment to use that will help you produce a quality recording on a budget.
CableWholesale Products related to this article:
 |
10A1-62115 | 1/4 Inch, Stereo, Male to Male, Patch Cable, 15ft |
 |
10XR-01215 | XLR Microphone Cable Male / Female, 15 ft |
 |
301-1003 | Decora Wall Plate Insert, 1 XLR Female, Solder Type, White |
 |
30XR-12100 | XLR Male to 1/4 Mono Male Adapter |
 |
10R2-02106 | 2 RCA Male / 2 RCA Male, High Quality Audio Cable, 6 ft |
 |
10TT-40106 | Premium Grade Digital Audio Toslink Fiber Optic Cable 5mm, 6 ft |